Why Is A Custom Font Important? How To Add A Custom Font?

Typography is a very important issue in a WordPress theme. if you want to get a good place in people’s minds, the Font, color, size you use is as important as your content.
The font of your site contributes to building a brand image as well as increasing readability and this will allow users to spend more time on your site. Custom fonts bring also your theme to take one step ahead.
The typography options is limited in WordPresste, by default but it might change depending on the theme you’re using. In this article, we’re going to explain how to add a custom font in a WordPress theme. So, lets start firstly where to download a custom font.
Where To Download a Custom Font From?
There are several sites where you can download free fonts from. We have compiled some of these sites for you.
- Google Fonts
- com
- Font Squirrel
- Typekit
You can download any those fonts for free by visiting these sites. When you add fonts to your website, make sure there are up to two because when you use more fonts, your site may slow down. Choosing two fonts will also show users that your site is consistent.
Hint: if you want to match the downloaded fonts and create a combination, we suggest you to visit this Font Pair site.
How To Add Custom Fonts?
There are two ways of addind custom fonts. Those ways;
A – Adding Fonts Using A Plugin
B – Adding Fonts Manually
For beginners, the plugin method might be easier to use and more useful. We have listed some popular plugins below to add fonts with the help of plugins. You can easily add new fonts to your site using these plugins.
A- Adding Fonts Using A Plugin
Under this topic, we’re going to mention about some of the best plugins for you. Lets just start!
1. Easy Google Fonts
Thanks to this free plugin, you can add and use Google Fonts without any coding knowledge is required.You need to download and install it on your WordPress panel. Click here to download this plugin.
You may also watch this video to see how to upload a plugin in WordPress panel.
After installing and activing this plugin, please navigate to Dashboard > Appearance > Customize >
Visual 1
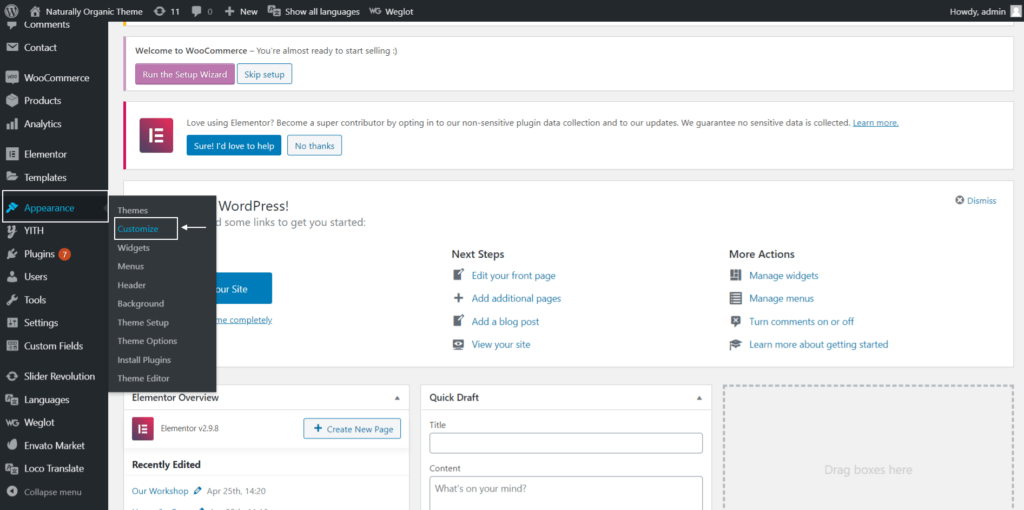
And then, as you can also see in the Visual 2, you’ll a new option named ” Typography “
Visual 2

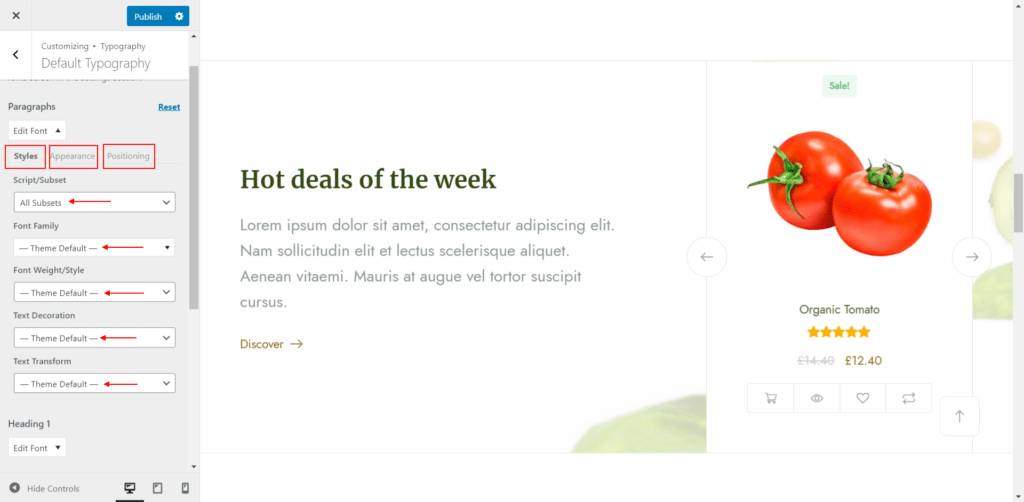
After click on the ” Typography ” button, you’ll many font options for per title tags as well as paragraphs.
Visual 3

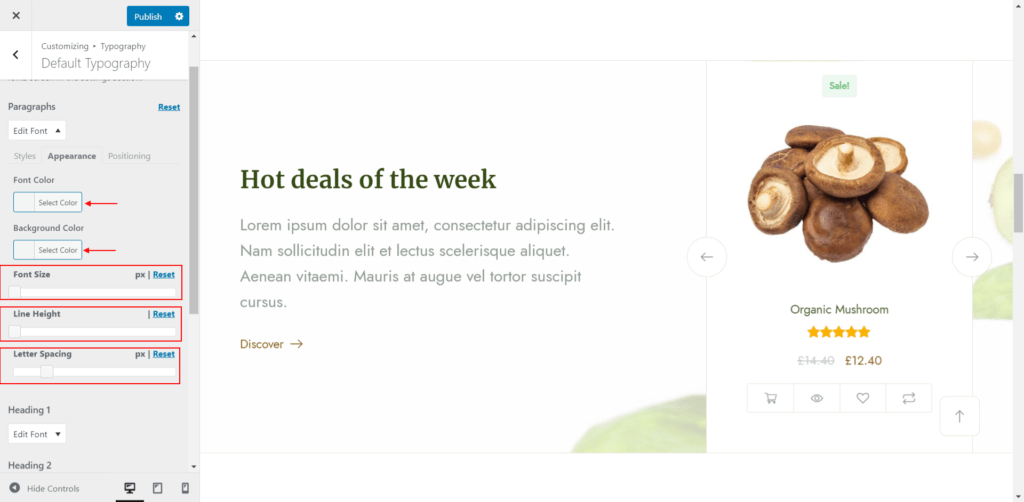
Lets make a test for paragraphs tag. Please see the Visuals 4, 5 and 6 below.
Visual 4
Visual 5
Visual 6
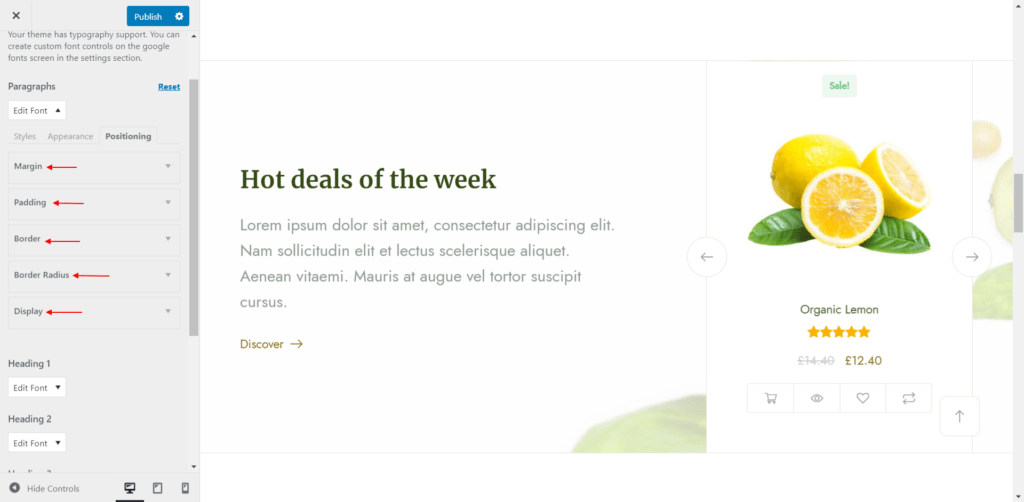
As you can see from the screenshots above, it’s quite easy to edit the fonts as you wish. You may also want to see the following video.
Important Note: So far, you’ve seen how to add fonts to certain places that the plugin offers you. Depending on the theme features, the plugin allows you to change the font of paragraphs and titles. However this plugin has an another important feature. The plugin allows you to create your own controls and interfere with your CSS selectors.
For example, we created a css selector called ” elementor a” in our ” Naturally Organic Food & Market Elementor WooCommerce Theme “in our theme. To change the fonts of the ” a elementor “, there are a few simple steps to apply.
As Ninetheme team, we’ve also taken a video, which cover this topic becasue it might sounds a bit confusing for beginners in WordPress. You may watch the following video that contains the required steps.
2. Typekit Fonts For WordPress

To use this plugin, you must first register. After signing up, you are asked to create your own kit. Download this plugin after you have created your kits and then after downloading, you can see the option in your WordPress panel from Dashboard > Settings > Typekit. Copy – Paste the embed code of the downloaded kit into this field. Click here to download this plugin.
3. Use Any Font
This plugin provides you with important benefits like others. All you have to do is install the plugin. After installing this plugin, create a free API key and use it. Click here to download this plugin.
B – Adding Fonts Manually
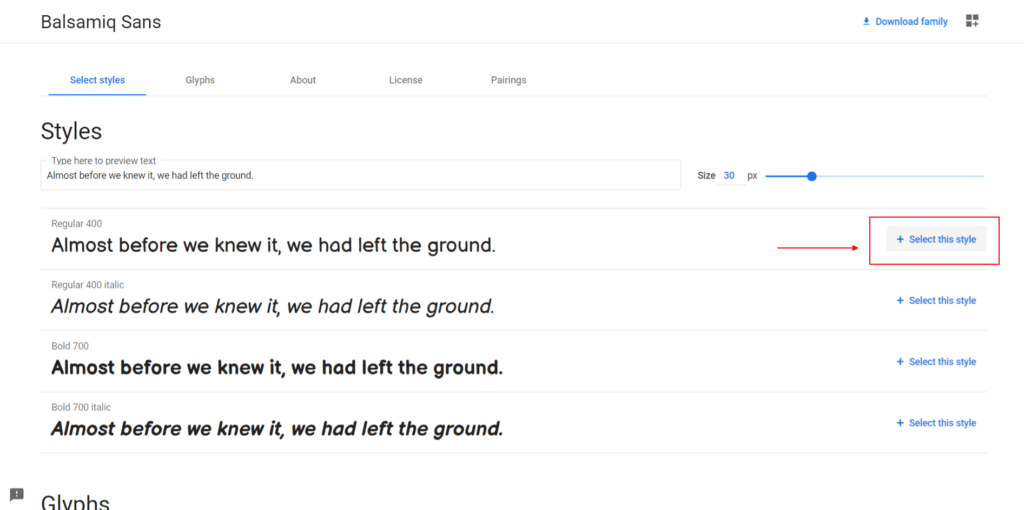
To add fonts manually, you should know know that some coding knowledge might be required. First off, visit the Google fonts library to determine the font you will use on your site. Then, as you can see in the Visual 7, click on the ” select this style ” button.
Visual 7
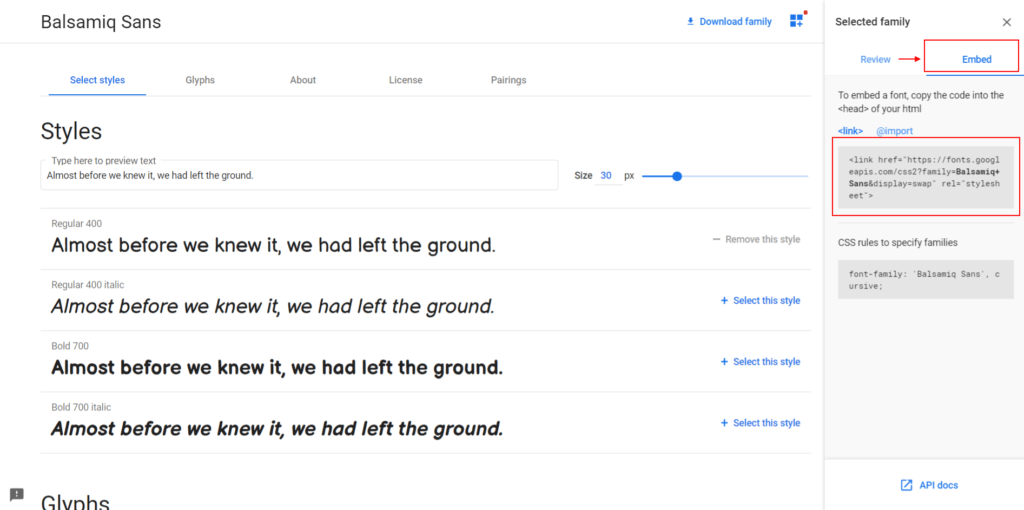
After you decide which font style you like to use, you need to click the ” embed ” button as seen in visual 8 and get the link.
Görsel 8
After getting this link, you can simply paste the code before the <body> tag in your theme’s header. php file. Don’t worry if you don’t know this method. You can handle this with a plugin, without going into the header.php file at all.
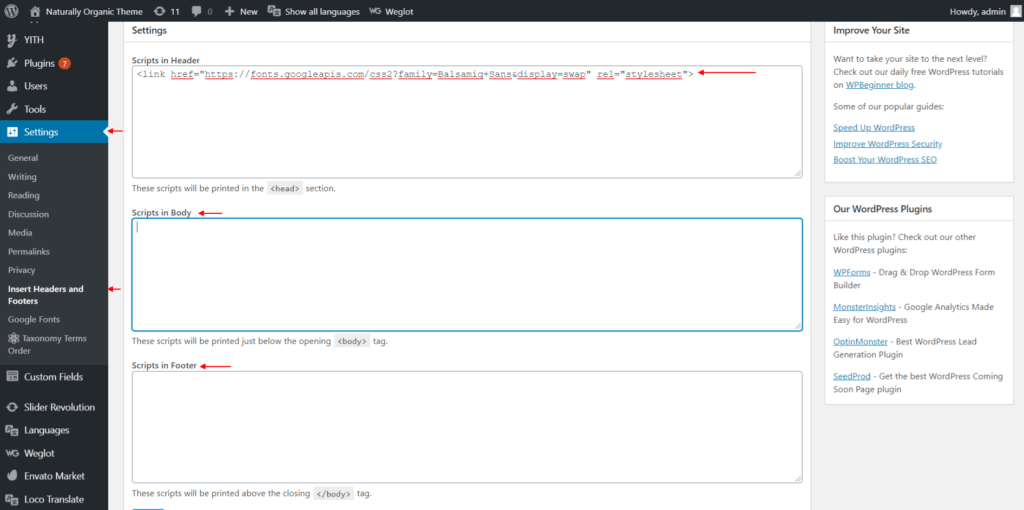
All you have to do is download the Insert Headers and Footers plugin. After downloading and installing the plugin, navigate to Dashboard > Settings > Insert Headers and Footers tab. As seen in visual 9, paste the code that you created into this field and other fields that you want to change. Then save the changes you made.
Visual 9
In this article, we tried to provide information about how to add fonts to your site. If you finf the videos useful, please don’t forget to subscribe to our youtube channel. You can post your questions and leave your comments using the contact button below.

If you have any questions about this article or other topics, please click the button below. Your questions will be answered soon.

If you want an affordable, reliable and fast WordPress server, just go ahead and click on the button and get a package as needed.
Related Posts

How to Install WordPress Theme Manually with XML?
Oct 12, 2023How to Fix Error Too Many Redirects in WordPress
Jun 23, 2023


Envato elements

Canva


Envato Market

Envato Placeit
Blog Categories
- Agriculture 1
- Design 3
- eCommerce 13
- Energy 1
- Extras 75
- Free 4
- Grocery Store 3
- Software 1
- Technology 2
- Themes 78
- WordPress 145
- Plugins 58
- Cache 5
- Security 8
- SEO 10
- Spam 5
- User Managament 10
- WooCommerce 6
- Plugins 58
- WordPress Speed 2
- WordPress Tutorials 55